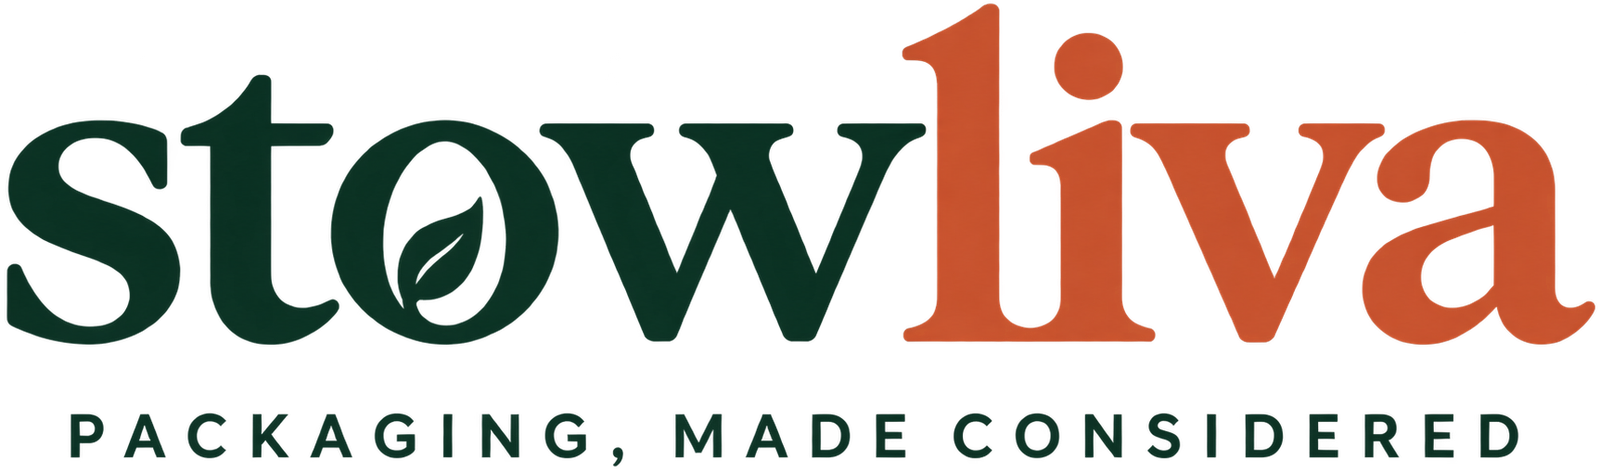
Rigid box packaging comparison
Custom Rigid Boxes: Magnetic, Drawer or Lift-Off Lid?
Compare the opening, insert and total packing cost before you commit to a premium box.
The opening of a premium box can make a product feel carefully considered. But a magnetic flap that will not sit flush, an insert that grips too tightly or an oversized shipping carton can undermine that experience. Custom rigid boxes work best when the structure, product fit and delivery system are designed together.
Quick answer: Start with a lift-off lid for a simple two-piece presentation, compare a drawer when you want a sliding reveal, and consider a magnetic book-style opening when the flap serves a clear purpose. Approve the insert, closure and print on a real sample. Confirm storage volume and the protective outer pack before comparing total costs.

What makes rigid box packaging different from a folding carton?
In packaging discussions, a rigid presentation box usually means a relatively stiff board structure covered with a decorative wrap. A folding carton is cut and creased from carton board so it can be assembled from a flat form. Corrugated shipping boxes use a different construction designed around their transport role. Ask the supplier to describe the proposed structure rather than relying on the word “premium.”
Some rigid formats stay assembled throughout storage; some collapsible designs use hinges and assembly features to reduce their stored volume. A magnetic closure does not tell you which of those constructions you are buying. The drawing should show the board panels, joints, wrap, closure and any parts you assemble before filling.
For a first enquiry, use Stowliva’s custom gift box page to describe the product and request the specific rigid construction you need. The listing is a starting point for a quotation: confirm which opening styles, board specifications and samples are available. Compare it with folding carton options if flat storage and fast assembly matter more than a substantial presentation shell.
1. Choose the opening style before designing the artwork
Opening style affects how the customer holds the box and sees the product. It also changes where you can put artwork, how you pack an order and how much space the empty box occupies. Choose the action first, then decide which surfaces should carry a logo or message.
| Style | Opening experience | Decision to test |
|---|---|---|
| Lift-off lid | The lid separates from the base | Grip, overlap, fit and space needed to set the lid down |
| Drawer | A tray slides from an outer sleeve | Pull access, sliding resistance and retention when tilted |
| Magnetic book-style | A hinged flap opens over the product | Flap alignment, closure and access around the hinge |
| Collapsible rigid format | Panels are assembled before filling | Assembly steps, corner consistency and stored pack dimensions |
A drawer suits a deliberate reveal only if a customer can find the pull and move it comfortably. A magnetic flap earns its place when it closes neatly and does not obstruct removal. A lift-off lid can keep the design simple, but the overlap must allow opening without shaking the contents. Test these actions with someone who has not seen your drawing.

2. Specify closure fit and repeat opening
For a lift-off lid, request a sample with the proposed wrap and board. Those layers affect fit. Check whether the lid sits level, whether the corners catch, and whether you can remove it while keeping the base steady. A plain prototype can approve general geometry; the final covered sample approves the actual opening feel.
For a drawer, check the sleeve and tray together. Pull it open at different orientations and see whether the insert stays in place. Inspect the pull tab or ribbon attachment. Decide whether the drawer should remain retained when opened, and record the intended behaviour instead of asking only for a “smooth” slide.
For a magnetic box, close the flap with the product and insert inside. Look for an uneven reveal, a raised edge or interference from the contents. Reopen it through an agreed number of cycles and inspect the hinge and wrap. That practical review helps compare samples; it does not establish a durability rating unless the method and result support one.
Make the tolerances and acceptable appearance part of your approval record. Photograph the front, sides and open box, then identify which sample represents the final specification. If a production material changes, ask whether a new approval is required.
3. Build the insert around removal as well as retention
An insert should locate the product while leaving customers a clear way to take it out. Measure the largest relevant product variant, including caps, handles and surface details. Identify the areas that may be supported and the areas that should avoid pressure. An insert that looks tidy from above can still trap a bottle or scrape a finish.
Compare paperboard structures, moulded fibre or foam only against the actual use requirements. The material name alone does not establish cushioning performance, recyclability or surface compatibility. Ask for the proposed construction and check it with real products. Test the fit again if the product’s dimensions or weight change.
Layout example: A gift set containing a 45 mm wide bottle and a 70 mm wide jar occupies at least 115 mm across before the divider and removal spaces are added. If a trial drawing adds a 12 mm separator and 6 mm at each outer side, its working width becomes 139 mm. These are illustrative design allowances, not a universal clearance rule. Approve the final cavity geometry and outer dimensions through a prototype.
For a set, review every component together. The heavier item should not shift into a smaller accessory when the box is tilted. Use Stowliva’s insert enquiry option to discuss the required layout, and read the packaging insert comparison for questions to include in the brief. A decorative filler should not be treated as a tested insert.

4. Approve the wrap, print and fine details on the finished box
Request artwork templates for each printed surface and indicate which face is visible when the box is closed. Check the logo in relation to the lid edge, drawer opening, flap and wrap seam. A flat digital design does not show how paper turns around a corner or how an opening divides the artwork.
Use the physical sample to compare colour, texture and the readability of small details. Look at large dark areas under the lighting used for product photography and retail display. Inspect rubbing, scratches, exposed corners and the inside wrap. Where foil or embossing is proposed, approve the exact shape and position rather than only a visual mockup.
Keep any product barcode or retail QR code away from folds, seams and graphics that affect its clear space. GS1’s retail 2D barcode guidance discusses quiet zones, placement and print quality. Verify the finished code for its intended scanning environment, especially where gloss or a curved surface changes how the reader sees it.
For launch kits, compare custom PR box enquiries and plan the product sequence before decorating every surface. An information card can explain the contents without crowding the lid. If you use custom printed cards, approve their fit with the insert and the closed box.
5. Keep the presentation box and shipping pack separate in the brief
A rigid shell can feel substantial in your hands and still need protection from abrasion, compression and impacts in transit. Assess the packed product, presentation box, cushioning and outer shipping carton together. Do not put an ordinary postal label on a decorative lid and assume the full system has been approved.
UPS’s packaging guidelines recommend a protective outer box for goods vulnerable to dirt, scratches or handling damage. They also describe cushioning and one-box versus two-box approaches. Use the carrier guidance as a starting reference, then confirm the method for your product and service.
ISTA’s design and testing guidance explains that the distribution environment should guide test selection. Ask a packaging specialist to identify an appropriate procedure and acceptance criteria. A drop onto a desk or a successful shipment to one address is feedback, not evidence for every route.
Include the outer shipping box in the quotation and compare it with the mailer and shipping box guide. Confirm which layers are included in the proposed price. Check that the customer can remove the presentation box without scuffing it against the outer carton.

6. Compare total cost and warehouse space
Separate production cost from the cost of receiving, storing, assembling and shipping the boxes. Ask for the number of empty boxes per master carton, master-carton dimensions and gross weight. For collapsible formats, request dimensions both flat and assembled. A lower unit price does not answer how much shelf or pallet space the order needs.
Storage calculation example: An assembled empty box measuring 250 × 180 × 100 mm occupies 0.0045 cubic metres as a simple rectangular envelope. One thousand such envelopes represent 4.5 cubic metres before master cartons and packing gaps. This is an arithmetic planning example, not a freight quote. Use the supplier’s actual packed-carton measurements to budget transport and warehouse space.
Customer shipping charges may also reflect size. FedEx explains dimensional weight as a way of considering the space a shipment occupies. Confirm the current rules for your service, destination and contract. Compare the final sealed outer package, not only the inner gift box.
Time a small packing trial. Record assembly, insert placement, product loading and closure steps. Compare a simpler lift-off structure with a collapsible or magnetic option using the same contents. Put your observed labour time beside the supplier quote so that the decision reflects your operation.
7. Make material claims specific and disposal instructions practical
Request a material list covering the board, wrap, adhesives, laminate, ribbon, magnets and insert. It helps you review the design and write disposal instructions that describe the actual parts. If customers must separate components, make the action easy to understand and check the instructions against the intended collection system.
FSC’s label explanations address forest-based material sourcing. Such evidence is distinct from a recycling claim for a complete box. The FTC’s Green Guides summary explains why environmental claims need support and why recycling access matters. Avoid borrowing a broad claim from the unconverted board.
The EPA’s common recyclables guide encourages reuse of gift boxes and checking local recycling rules. A useful, easy-to-open box can be kept for storage, but do not assign it an environmental benefit without evidence. Simpler materials and removable components are design choices to evaluate, not automatic certification.
Before ordering, send Stowliva a custom packaging brief with the product samples, usable internal dimensions, preferred opening, insert layout, artwork, quantities, delivery destination and required approval checks. Ask for alternative structures where available. Choose the box that opens well, releases the product cleanly and fits the complete storage and shipping plan.
Custom Rigid Boxes: frequently asked questions
Are magnetic boxes always rigid boxes?
A magnetic closure describes how a flap closes, not the full box construction. Ask for a drawing and sample showing the board, wrap, joints and whether the box is supplied assembled or collapsible.
Which is better: a drawer box or a lift-off lid?
A drawer gives a sliding reveal and needs a comfortable pull and controlled fit. A lift-off lid gives a simpler two-piece opening. Choose by the product, removal action, packing routine and approved sample.
Can custom rigid boxes be used as shipping boxes?
A presentation box may still need a protective outer shipping package. Assess the product, insert, decorative box, cushioning and outer carton as a complete system for the intended route.
Are rigid gift boxes recyclable?
Check the finished board, wrap, coatings, adhesives, magnets, ribbons and insert against local collection requirements. Material sourcing certification is separate from evidence that the complete box is recyclable.
About this guide: Prepared by Stowliva Editorial using the linked technical references, reviewed October 12, 2026. Examples are illustrative. Confirm final specifications and claims for the selected order.